I recently had an opportunity to make some party snacks-something I haven't done in a very long time.
When we lived in Virginia, I frequently hosted a game night. I loved making food for these nights and I hope now that we are a bit more settled in Nebraska we can start having people over on a more regular basis.
If you've never made baked brie, it something you have to try!
It is super easy to do and absolutely delicious!
Normally, I'd top a wheel of brie with some sort of jam (apricot/raspberry), and nuts. Then, I'd wrap the brie in crescent rolls and bake for about 20 minutes.
However, I made a savory version this time because I already had a dessert I wanted to make.
Before wrapping the wheel in crescent dough, I put some spicy brown mustard on top of the brie and wrapped it in pancetta.
I was ridiculously excited to pop the tube of crescent rolls because it's been
nearly two years since I've used a store bought dough. I love it when the
tube pops open!
Side Note:
It is very important to let the dish cool for at least 15 minutes before you cut it. It can be difficult to wait when you know what deliciousness awaits. However, if you cut it too soon all of the brie will run. (For the record, I don't mind when that happens.)
At the end of the night I realized I never ate a bite of this dish but everyone seemed to enjoyed it. Charlie says he didn't care for the mustard, but it didn't stop him from eating it.
On to the sweet...
It was the first warm weekend so I want to make a Spring-y dessert that wasn't a cake or a pie and I came up with Strawberry Shortcake Rice Krispie Treats!
They are basically rice krispie treats with chunks of Angel Food Cake inside that are topped with whipped cream and strawberries. I wish I could claim credit for this idea but I found the recipe here along with an insane amount of sinful rice krispie treat recipes.
All rice krispie treats should have cake in them!
If I make these again I'll use pound cake or an actual short cake. I did buy the Angel Food cake (!) which made this treat very easy to put together.
These rice krispie treats just look like Spring, right?
Wednesday, March 18, 2015
Monday, March 16, 2015
Homemade Flour Tortillas :)
My tortilla project may have gotten a bit out of hand...
I made tortillas 4 times in 6 days because the perfect tortilla continually seemed just out of reach.
In fact, I'm making a 5th batch right now because I still don't think I have it quite right.
After sifting through about 15 recipes for flour tortillas, this seems to be a basic and reliable place to start:
Putting the dough together is easy. Mix all the dry ingredients together. Add the liquid. Then mix together and knead until you have a smooth dough.
You can use a food processor if you want, but with a recipe this small I think it is easier to use a bowl and your hands.
Divide the dough in to 16 equal portions (a scale is handy here).
If you don't have a scale, divide the dough in half. Then, in half again and again and again until you have 16 portions.
If you use a scale, make sure you weight the dough each time you make the recipe because even if you follow it exactly again and again the weight of the dough will vary slightly.
Roll the portions in to balls and flatten.
Cover with a kitchen towel/proofing bag, and let the dough rest for at least 15 minutes rest. I found 30 minutes worked best for me.
Then, roll out the dough in to a tortilla about 6 inches wide.
Attempting to roll perfectly circular tortillas certainly set off my OCD. I'll not bore you with my bitter thoughts or the
profanity that came out of my mouth. Instead, let's just say tortilla rolling is an area of growth for me!
Immediately cook the tortillas in a pan on medium heat. Flip when they just start to brown (30-45 seconds).
The tortillas will keep in the fridge for a day or in the freezer forever. Store them separated by wax paper or paper towels.
Once frozen, they take maybe 30 seconds to reheat in a pan or a few minutes on a sheet pan in the oven.
-------------------------------------------------------------------------------------------------------------------------
I did follow the basic recipe above the first time around, but I changed it up each time after the test run.
For all of my other tortilla attempts I used 2 cups of whole wheat flour and 1 cup of AP flour.
Whole wheat flour is more absorbent that AP flour.
Therefore, I added about 3 extra tablespoons of warm water to make the dough as supple and malleable as I felt it should be.
The use of whole wheat flour produces a somewhat firmer tortilla. I don't mind the texture as a trade off for a bit more nutrition in my tortillas.
After figuring out the whole wheat substitution, I began adding spices. I made one batch with cumin and garlic. Another batch contained ground chipotle powder.
My most recent batch (and the one pictured above) contains 2 teaspoons of chipotle powder, 1 teaspoon of onion powder, and 2 teaspoons of garlic powder. Spicy and delicious! Perfect for carnitas, eggs, and anything else!
At any rate, I can guarantee you that there will never be store bought tortillas in my house again.
Fresh tortillas make EVERY dish better!
I've used them for tacos, breakfast burritos, quesadillas, and simply wrapped around cheese and meat for a quick meal/snack. So easy and delicious!
I made tortillas 4 times in 6 days because the perfect tortilla continually seemed just out of reach.
In fact, I'm making a 5th batch right now because I still don't think I have it quite right.
After sifting through about 15 recipes for flour tortillas, this seems to be a basic and reliable place to start:
3 cups of flour
1 teaspoon baking powder
1 teaspoon salt
1 cup of warm water
1/3 cup oil
Putting the dough together is easy. Mix all the dry ingredients together. Add the liquid. Then mix together and knead until you have a smooth dough.
You can use a food processor if you want, but with a recipe this small I think it is easier to use a bowl and your hands.
Divide the dough in to 16 equal portions (a scale is handy here).
If you don't have a scale, divide the dough in half. Then, in half again and again and again until you have 16 portions.
If you use a scale, make sure you weight the dough each time you make the recipe because even if you follow it exactly again and again the weight of the dough will vary slightly.
Roll the portions in to balls and flatten.
Cover with a kitchen towel/proofing bag, and let the dough rest for at least 15 minutes rest. I found 30 minutes worked best for me.
Then, roll out the dough in to a tortilla about 6 inches wide.
Attempting to roll perfectly circular tortillas certainly set off my OCD. I'll not bore you with my bitter thoughts or the
profanity that came out of my mouth. Instead, let's just say tortilla rolling is an area of growth for me!
Immediately cook the tortillas in a pan on medium heat. Flip when they just start to brown (30-45 seconds).
The tortillas will keep in the fridge for a day or in the freezer forever. Store them separated by wax paper or paper towels.
Once frozen, they take maybe 30 seconds to reheat in a pan or a few minutes on a sheet pan in the oven.
-------------------------------------------------------------------------------------------------------------------------
I did follow the basic recipe above the first time around, but I changed it up each time after the test run.
For all of my other tortilla attempts I used 2 cups of whole wheat flour and 1 cup of AP flour.
Whole wheat flour is more absorbent that AP flour.
Therefore, I added about 3 extra tablespoons of warm water to make the dough as supple and malleable as I felt it should be.
The use of whole wheat flour produces a somewhat firmer tortilla. I don't mind the texture as a trade off for a bit more nutrition in my tortillas.
After figuring out the whole wheat substitution, I began adding spices. I made one batch with cumin and garlic. Another batch contained ground chipotle powder.
My most recent batch (and the one pictured above) contains 2 teaspoons of chipotle powder, 1 teaspoon of onion powder, and 2 teaspoons of garlic powder. Spicy and delicious! Perfect for carnitas, eggs, and anything else!
At any rate, I can guarantee you that there will never be store bought tortillas in my house again.
Fresh tortillas make EVERY dish better!
I've used them for tacos, breakfast burritos, quesadillas, and simply wrapped around cheese and meat for a quick meal/snack. So easy and delicious!
Thursday, March 5, 2015
Carnitas!
!CARNITAS!
My first attempt at carnitas started as an innocent endeavor to make homemade tortillas for a recent batch of breakfast burritos.
Charlie suggested that since I was making tortillas I should also make a dish to go with them. I guess the breakfast burritos don't count ;)
As with any recipe I make, I scoured the internet and all of my cookbooks to put together a recipe that I thought would turn out well. Of course, that means I took bit and pieces from about 7 different recipes and came up with the one below.
- 8# bone in pork butt
- 1 can of chipotle peppers in adobo sauce
- enough bacon grease to cover the pork butt
- 2 tablespoon chili powder
- 2 teaspoons ground cumin
- 2 teaspoons dried oregano
- 2 teaspoons salt, or more, to taste
- 1 teaspoon ground black pepper
- 8 cloves garlic, peeled and minced
- 2 bay leaves
- 1 red onion, quartered
- 1 jalapeno diced with seeds
- 1 jalapeno chopped and seeded
- 1 large orange, juiced
- 2 limes, juiced
I found a lot of debate over:
- the proper cooking temperature
- whether to cook the pork butt whole or cut it up and sear it first
- whether to cook in lard or stock/juice
- the proper cooking vessel
If you really want to read about the intricacies of pork butt cooking, here's the best breakdown I found: Carnitas Food Lab
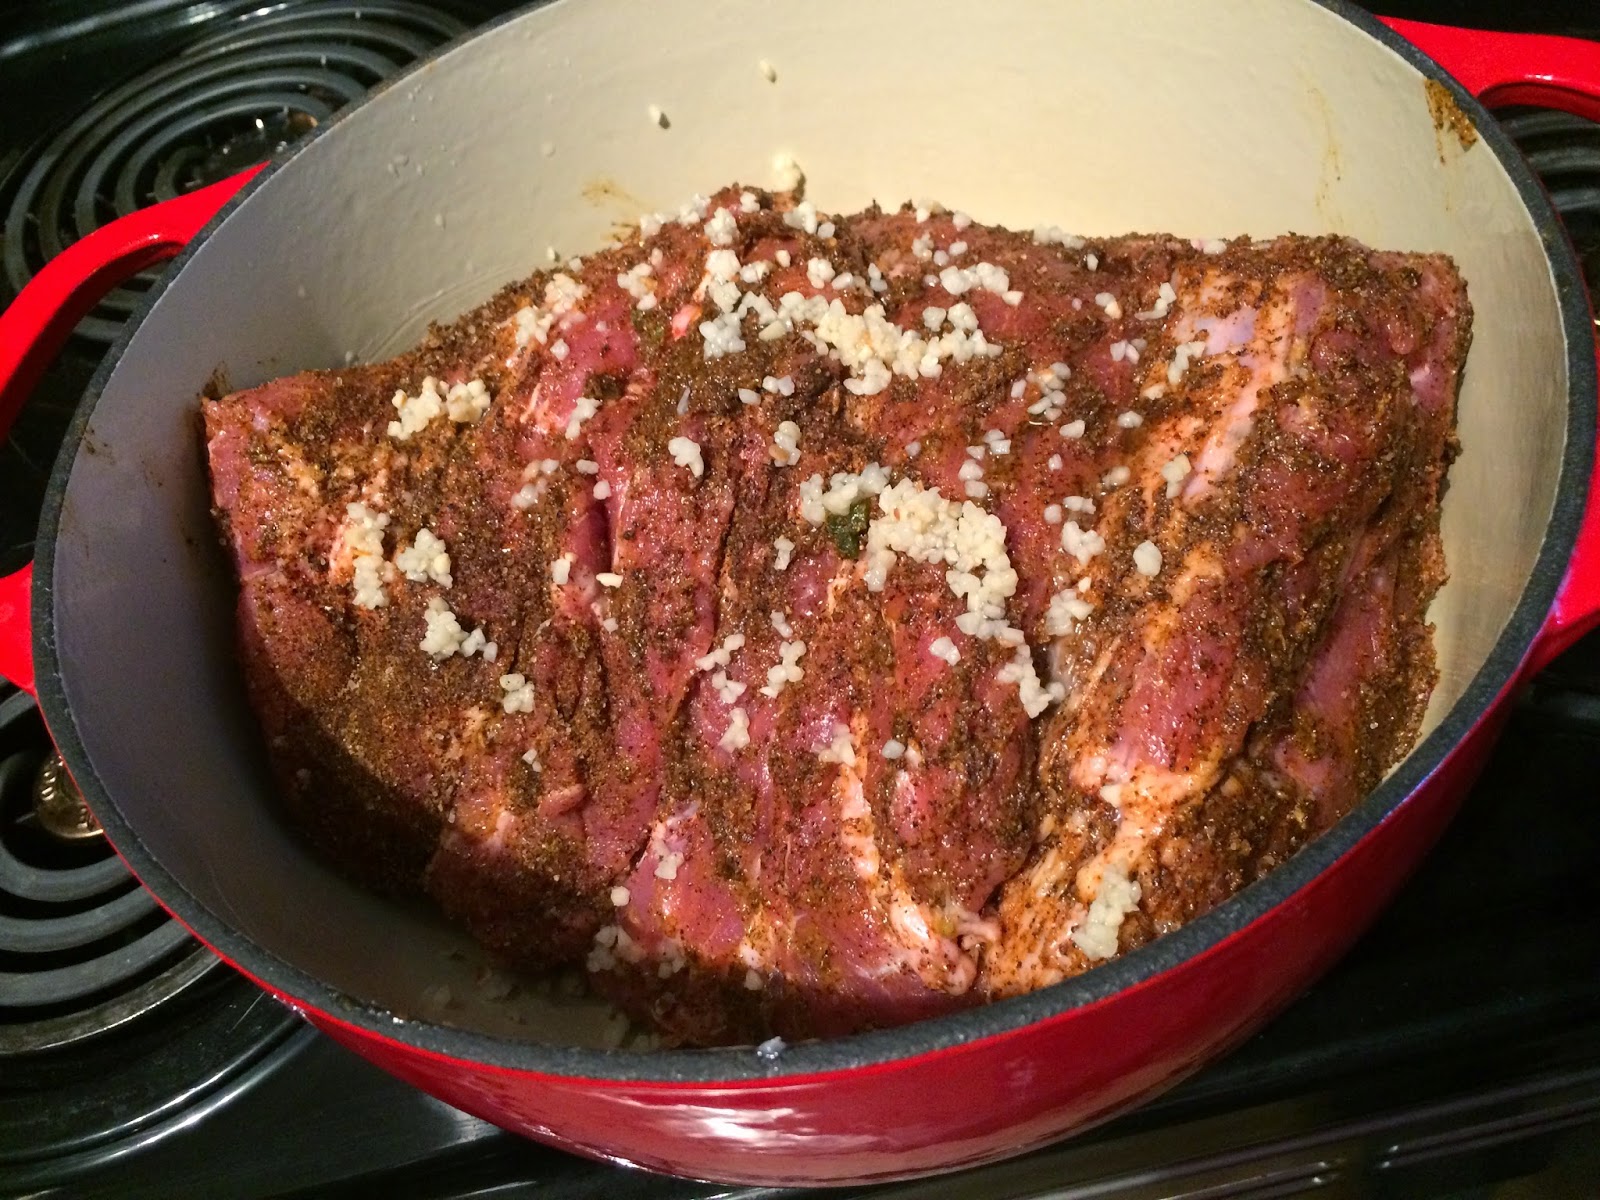
I massaged the pork butt with bacon grease and then rubbed on the dry spice mix. Then I cooked the pork butt in my dutch oven at 200 degrees for roughly 6 hours. My goal was to catch it right when the thermometer read 155.
However, I didn't get the pork but in the oven until 4pm.
I was checking the dish at 2 hour intervals since this was an experiment.
Somewhere around 9:30 I must have fallen asleep and when I pulled the pork but out at 10:30 it temped at 170.
I was checking the dish at 2 hour intervals since this was an experiment.
Somewhere around 9:30 I must have fallen asleep and when I pulled the pork but out at 10:30 it temped at 170.
I kept all of the cooking liquid/fat in a large pyrex overnight to add back to the pork (once it was shredded) the next day for added flavor and to reincorporate the fat.
I CAN'T emphasize enough how important it is to keep the cooking liquid!
The important part is to skim the fat and add it back to the meat. I added a good portion of the liquid back to the portions I put in the freezer as well.
I broiled the portions just before eating them to crisp them up a bit.
I divided the meat in to 1.5# portions. I ended up with 3 bags in the freezer and 2 nights of dinner. To be fair, we gorged ourselves the first night because it was so delicious!
The next time I make this, and there WILL be a next time, I'd cut out one of the limes. Additionally, I'd rub the pork but down with the bacon grease and cover in the spices the night before I plan to cook it. I think doing so would allow the spices to come through more in the finished product.
For those that are interested, I'll share my experiment with homemade tortillas on Monday.
Subscribe to:
Posts (Atom)