Friday, July 18, 2014

Fancy Meringues


ummm...how creepy is this?

 This Summer I am taking Pastries, a class that builds on what I learned in Baking Basics.

Out of all the classes I'm taking this Summer this one might be the one I'm enjoying most because it allows for a certainly level of personal creativity.

And, this class more that any other I've taken is exposing me to a wide variety of desserts that I've certainly never tasted and quite often have never even knew existed. Fun!

Recently we had a class that focused on baked aerated desserts.

I signed up to make a chocolate souffle and a plated dessert called "Pink Peppercorn Pavlova with Passion Fruit Curd and Berries."

Chocolate souffles certainly aren't all that exotic but I don't think I had ever eaten on and they are hella difficult to get right.

The most helpful tip I learned while making this souffle is that this is one dessert that should be served wet in the center and to the edges. If the souffle looks like cake, it is over baked.

My addition to this recipe was a vanilla clove creme anglaise.  The souffle recipe called for dark chocolate, orange juice, and orange liqueur for flavoring and I think clove and orange complement one another nicely.


The Pink Peppercorn Pavlova caught my eye because I always like desserts that incorporate  traditionally savory flavors.

The dessert is a free form meringue disk that has ground up pink peppercorns in it. Since it is a pavlova the inside should be chewy not dry/crisp like a traditional baked meringue. 

The curd is made with a passion fruit puree the same way you'd make lemon curd.

The berries were macerated in vanilla, sugar, and aged basalmic vinegar for 20 or 30 minutes.

The pavlova is very sweet and the spiciness of the peppercorns really works well in this dish. The curd added a nice sweet tang and the berries bought some much needed freshness and an additional texture to the dessert.

Wednesday, June 25, 2014

Yep, It is Officially BLT Season


maybe I watched too much Parks and Recreation this weekend!
BLT's are one of my favorite Summer comfort foods.

The Farmer's Markets in Omaha are amazing. I recently found quite literally the most perfect tomatoes I've ever had in my life there about three weeks ago.


The amazing produce coupled with the surplus of bread I now have on hand due to the Artisan Bread class I'm taking will likely lead to a weekly BLT.

Oh, and of course, I added Sriracha to my list of mandatory BLT ingredients! Yum!

Ingredients:

Bread of Your Choice
Amazing Lettuce
Perfect Tomatoes
Bacon (Nitrate Free, if possible)
Sriracha
Mayo (Sadly, my Dukes didn't make it past TSA)
Salt
Pepper
If you like super crispy bacon like I do here's my one tip: bake it!

Put an entire package of bacon on two sheet trays lined with parchment or foil.

Put the bacon trays in a cold oven and turn on to 400 degrees.

Walk away, for about 14 minutes (or however long it takes your oven to preheat.

At that point, check the bacon. You may need to rotate the pans on drain some of the grease.

With my oven, 14 minutes gets the bacon almost done and at most it take about 8 more minutes to finished cooking.

Bacon in the oven ="s a high volume of hand's free bacon prep without the grease burns from the stove.

Tuesday, June 24, 2014

Involtini di Melanzane


Involtini di Melanzane = Baked Eggplant Rolls

A quick search showed me that there are umpteen variations of this dish: appetizer, side, main, stuffed with cheese, meat, other veggies, and really any combination thereof. However, perhaps the most traditional version is to stuff the eggplant rolls with some type of cheese and top with a marinara sauce.

When I came across this recipe, I was looking for a new way to serve my meat loving fiance eggplant as a main dish.

I LOVE fried eggplant but was looking for a healthier option and a way to include more fresh veggies.

I was also looking for a recipe that would let me show off my savory cooking skills after laboring over cakes, breads, pastries, custards, and all things sweet for the last two months.

Here's what I came up with:

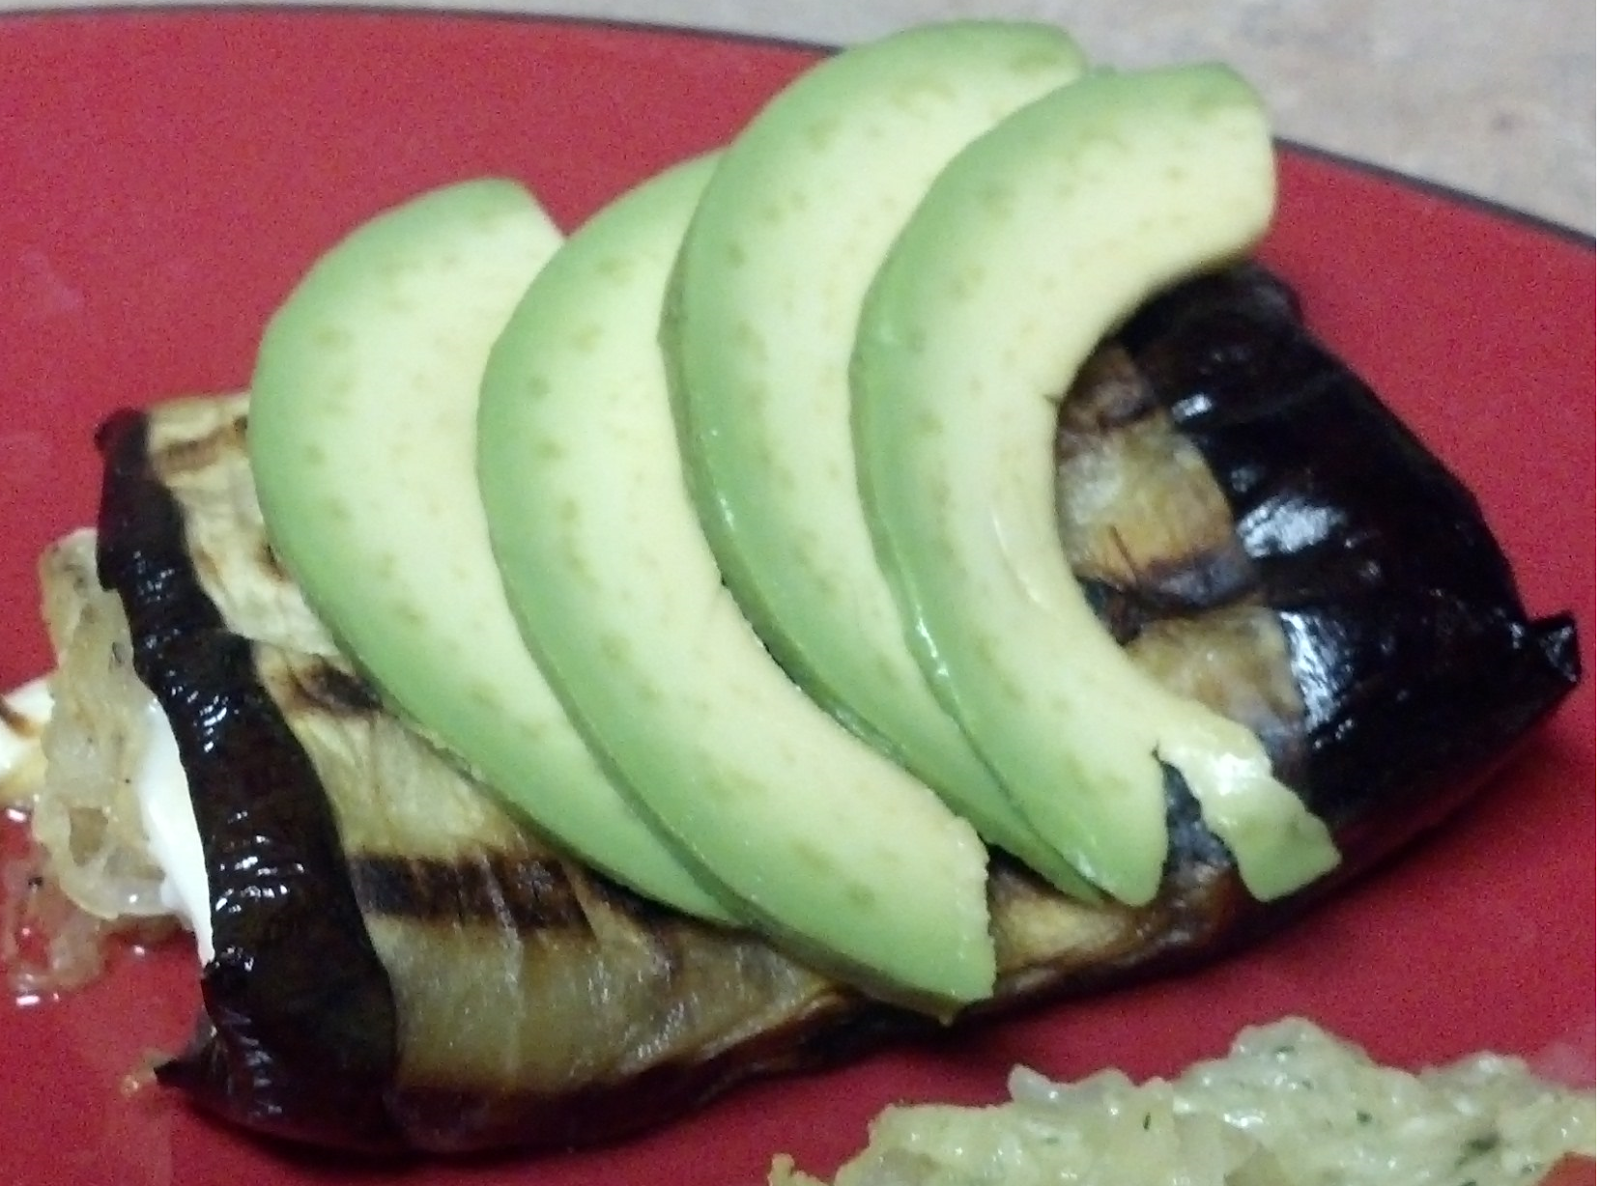
Baked Eggplant Rolls with Spaghetti Squash, Fresh Mozzarella, and Pesto

Ingredients

1 small/medium eggplant
1 spaghetti squash
1 bunch of fresh basil
grated Parmesan
walnuts
fresh basil
garlic
salt
pepper
evoo


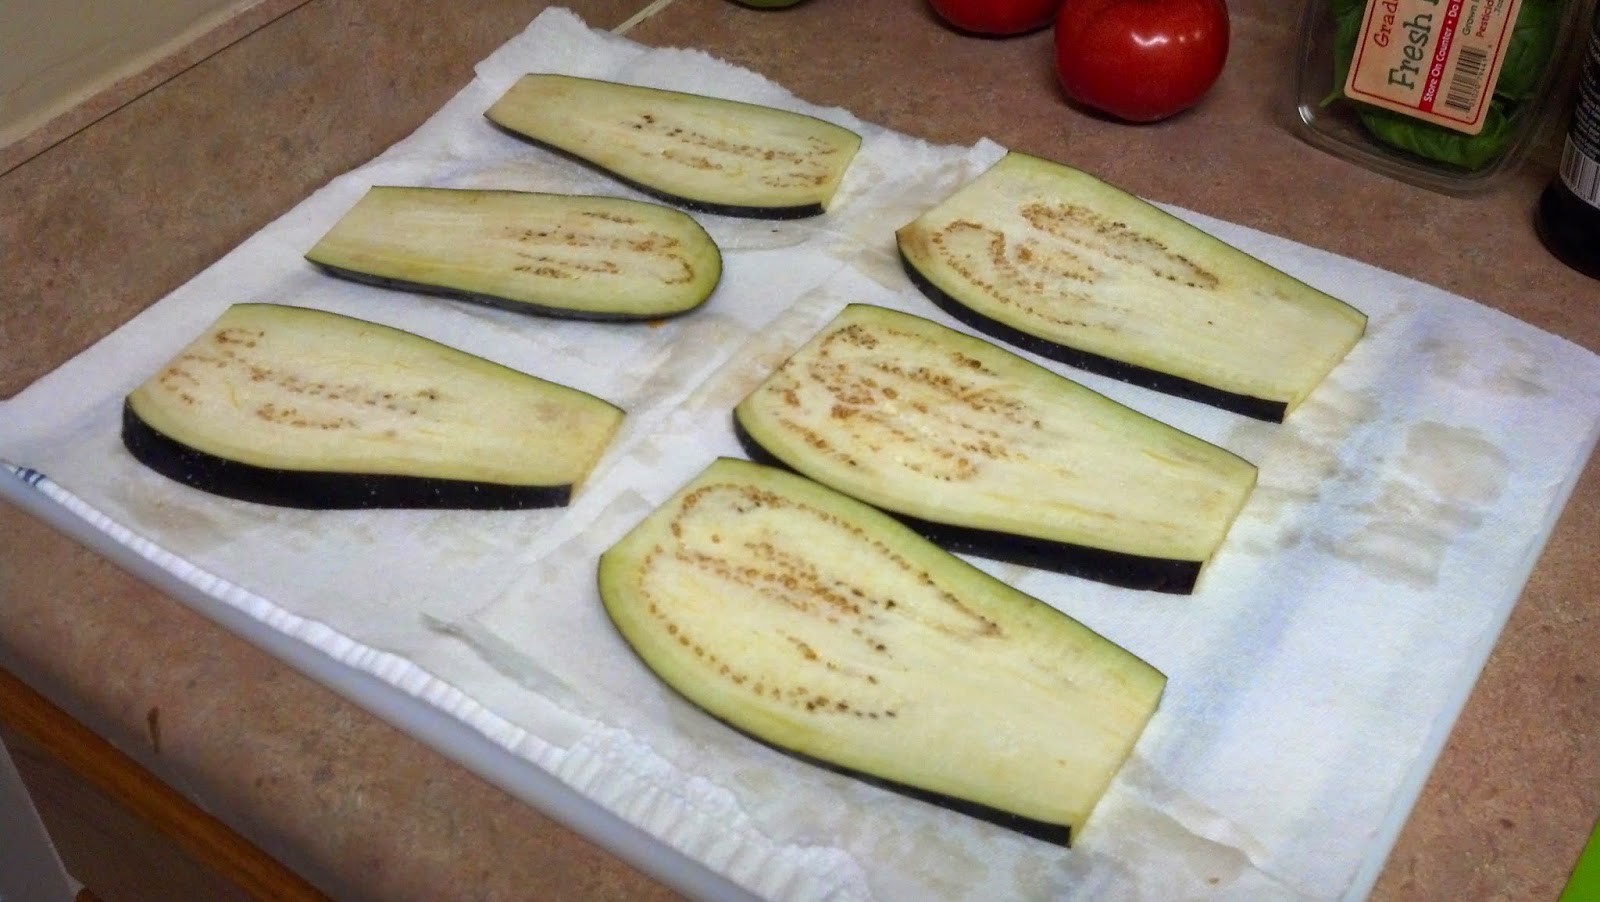
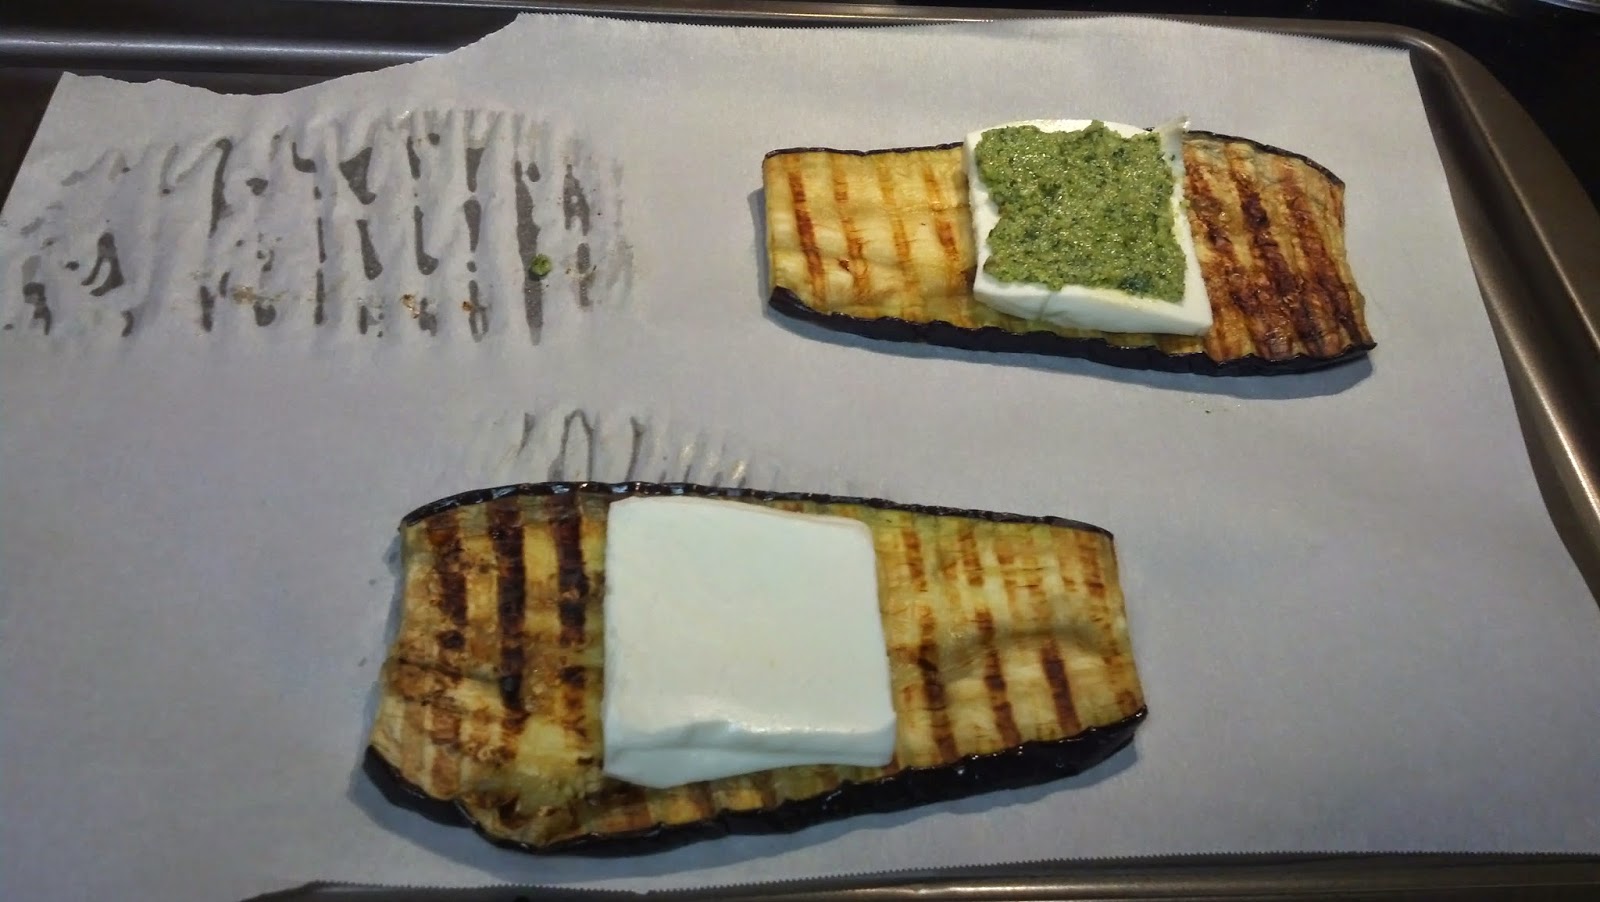
To create this dish, slice the eggplant lengthwise (not in rounds). Then, salt and let drain.


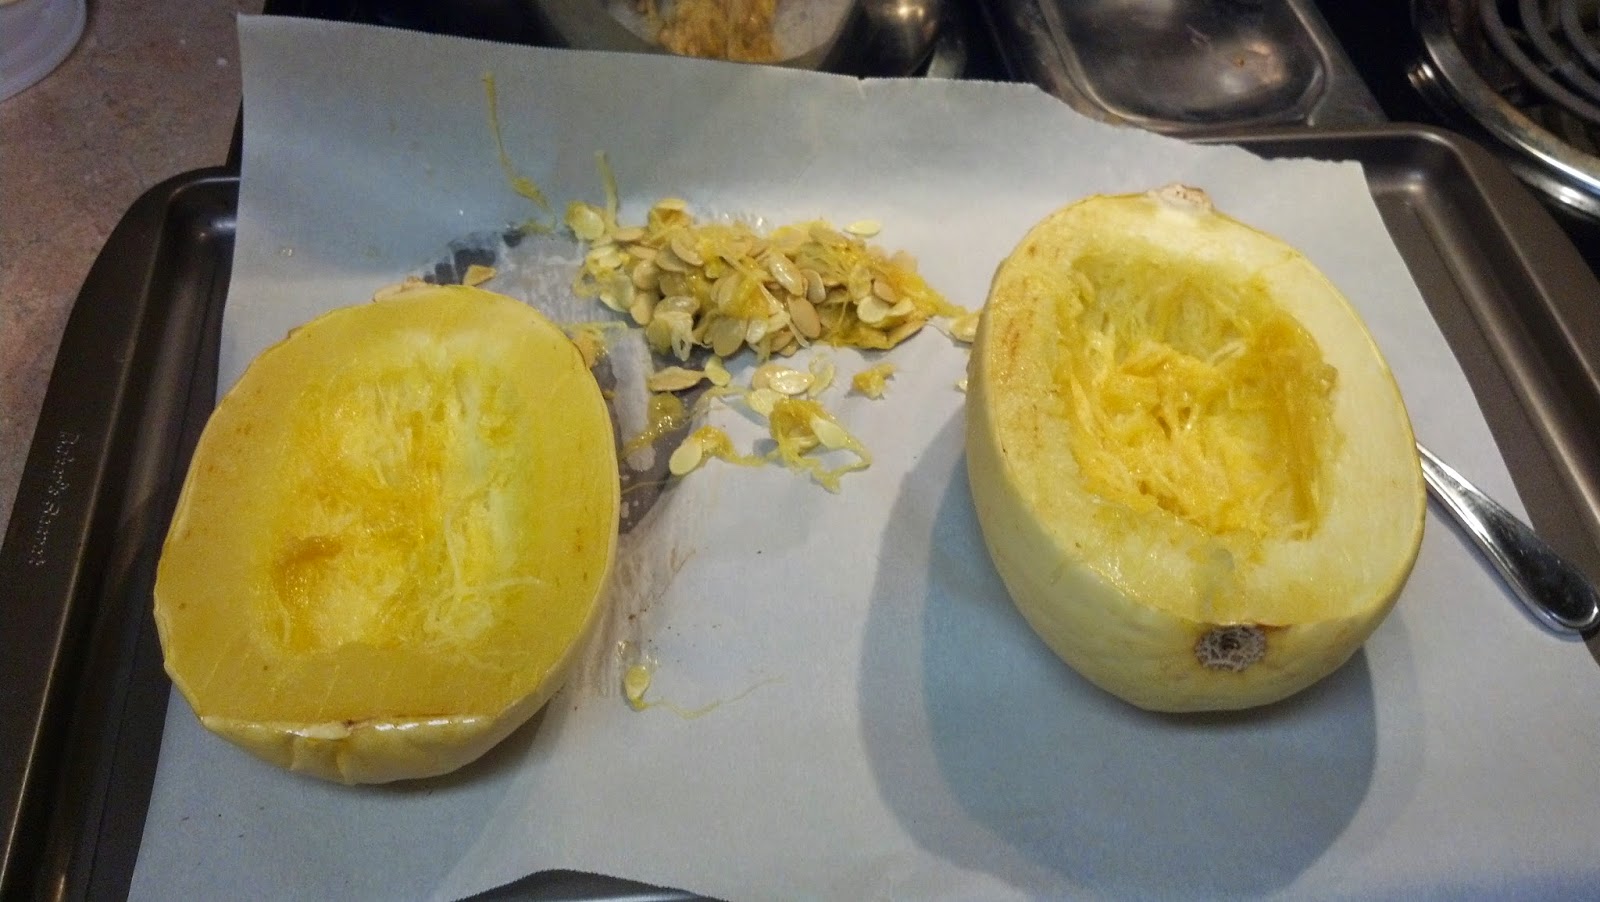
Cut the spaghetti squash in half and bake face down on a foil lined sheet pan at 375 for about 25 minutes or until a paring knife easily pierces the skin.


While the squash is cooling, rinse, dry and then grill the eggplant after lightly brushing it with olive oil. Place on towel to drain and season with salt and pepper.


Then, make some pesto. I used a food processor. I used an entire bunch of basil, 3 cloves of fresh garlic, 1/2 cup of walnuts, 1/2 cup of grated Parmesan, and then drizzled with olive oil until the right consistency was reached. I do adjust the Parmesan and walnuts as needed depending on the amount of basil.

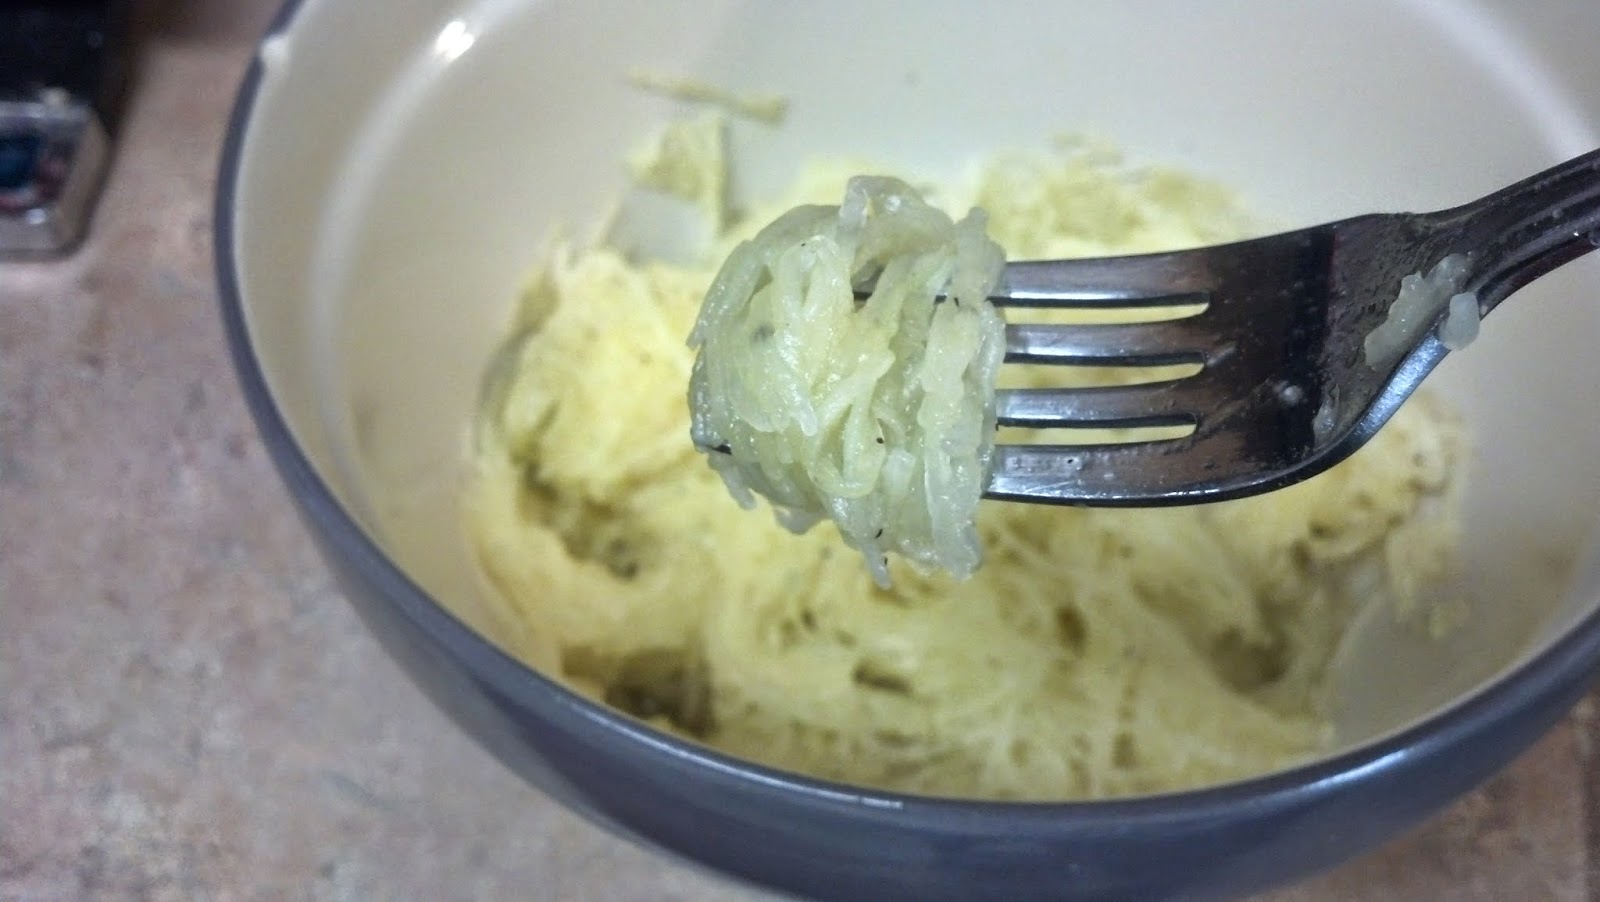
Once squash is cool, use a spoon to remove the seeds. Then scrape with a fork the get those
spaghetti-like strands. Place in a bowl and toss with olive oil, salt, pepper, and Parmesan.


Lay a rectangle of mozzarella topped with 1/2 T of pesto on top of one piece of grilled eggplant.

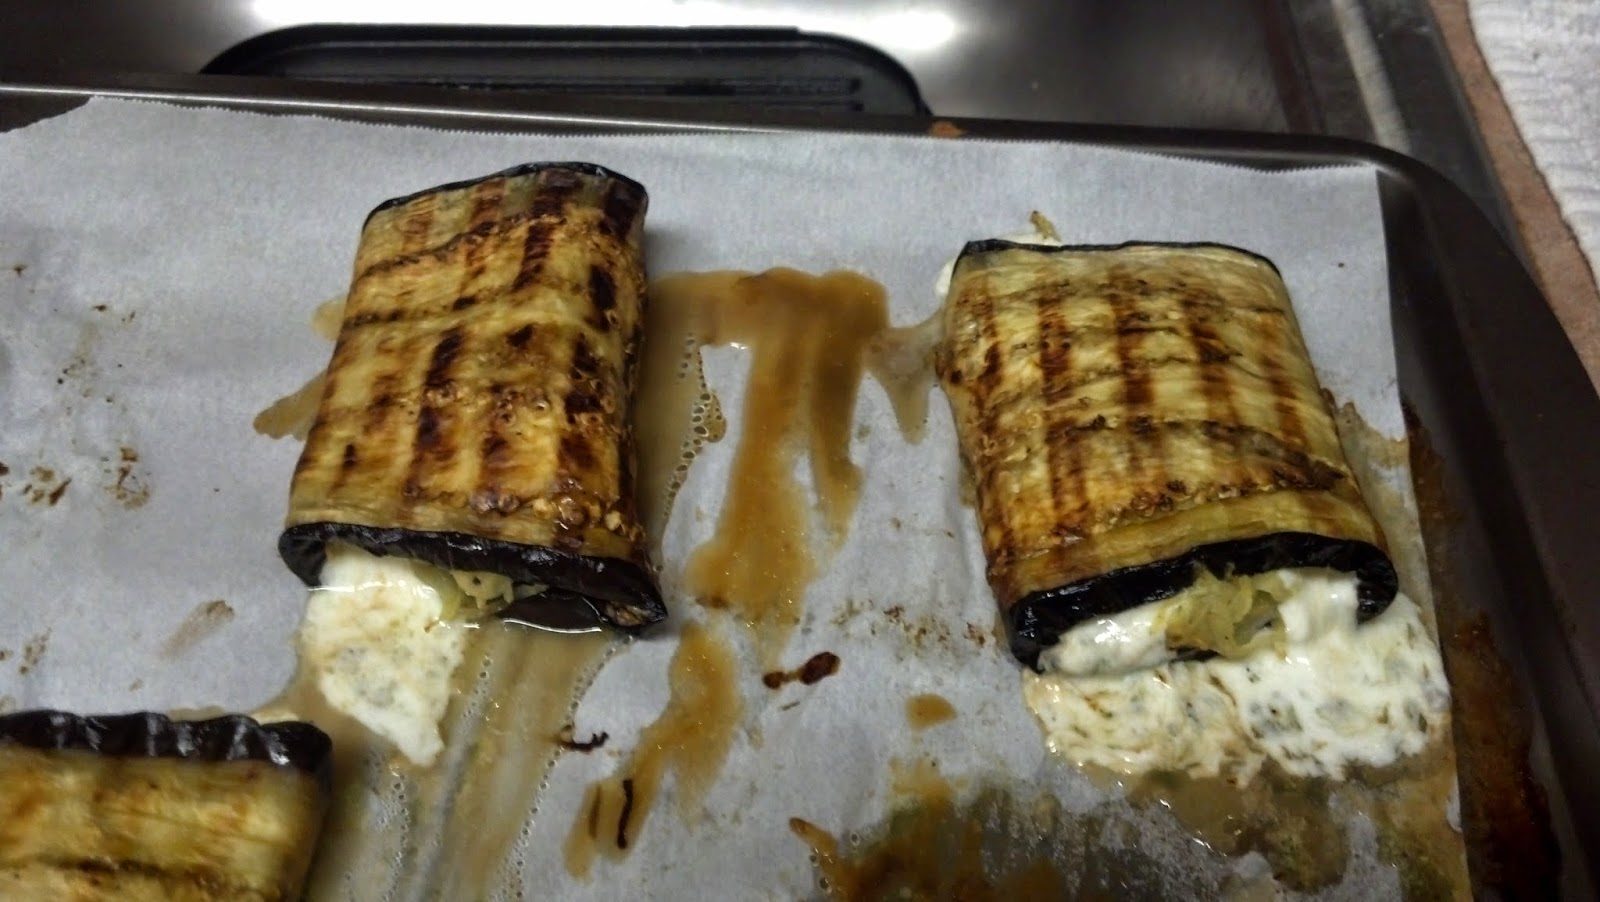
Then, add a bundle of the spaghetti squash. Roll the eggplant up and place seam side down on a foil lined sheet tray.

Wrap with a slice of eggplant and place seam side down on another foil lined sheet tray.

Bake at 350 for about 20 minutes to melt the cheese.

To serve, I topped the eggplant bundles with avocado but they are great without or you could add some more pesto if you love it as much as I do.

Yay, eggplant fun!

Tuesday, May 13, 2014

The Burger Stand Review

Recently, Charlie and I ended up back in Kansas. I spent a few hours wandering around Topeka and received several recommendations for The Burger Stand as THE place to go for burgers.

I don't eat many hamburgers but I've learned that when more than one person tells you a place is worth checking out, you go.

The Burger Stand is located on the edge of Washburn University and is surrounded by student housing. For their concept, this location is perfect.

The menu at The Burger Stand consists of gourmet burgers and fries. You can take a look at the complete menu here.

The burger list had a few notable toppings (habanero cactus jam) but the french fry offerings were impressive for a beer and burger joint: poutine fries, truffle fries, smoked tofu fries (?), and duck fat fries to name a few.

burnt crispy bit at the bottom of the stick :(
I ended up at The Burger Stand for a really late lunch and I knew I couldn't handle a whole burger so I opted for the corn dog with house made batter and, on the recommendation of an employee, the sweet potato fries.

Now, you might be asking why I went with such a generic fry choice with so many options on the menu.

SAUCE BAR!


Well, the sauce bar is why! After you pick up your order you can head over the the sauce bar which had at least 10 different dipping and burger sauces!

I tried four of the sauces that I found the most unique: toasted marshmallow,  garlic Parmesan aioli, cocoa ketchup, and a jalapeno ranch.

All of the sauces are made in house.I found them all to be delicious.

My secret love of greasy corn dogs was cultivated by childhood trips to the State Fair. The best corn dogs are crispy, greasy, salty, and have just the right amount of batter stuck to the stick at the bottom of the corn dog for one last amazing and crunchy bite of batter.

And, it is food on a stick. You just can't go wrong there.

Yes, I'm serious about the corn dogs I eat.

death by corndog
Sadly, the corn dog was a disappointment. The batter was burnt. It was soaked in an intolerable amount of grease. And, after my first bite, I realized its stick was actually to kitchen skewers-ummm....dangerous!

I gave up on the dog after three bites but the fries and all their sauces were great. The toasted marshmallow sauce may sound strange but it was the runaway star. Seriously, I'd bathe in it!

sidewalk chalk for customers to use on the building


All in all, I'd say The Burger Stand is a place I'd go back to if I ever find myself in Topeka again. However, I'd certainly order a burger and I'd try some of their other fries. It has an great ambiance. In fact, it has a cool factor that you only find in college town eateries.


And, you can't be too upset by a place that Heisenberg would visit! ;)

Sunday, April 27, 2014

Watermelon Mint Sherbet


After an 80 degree day outside and an 80 degree day inside since Charlie likes to turn off the air conditioning when I'm not looking, it was time for a cool refreshing treat.

Before culinary school that would have meant going out for ice cream or heading to the grocery store.

Not anymore.

churn baby churn
With the giant watermelon we purchased last week plus the newly acquired ice cream attachment for Janet that now lives in the freezer, I was ready to give sherbet a second try.

After some research I finally settled on the following recipe:

4 cups Watermelon Juice (you can puree in a blender and strain if you don't have juicer)
10.4 oz sugar
3TBS fresh lime juice
1/4 tsp kosher salt
8.5oz heavy cream
Fresh Mint to taste

This recipe comes together quickly. But, it does take some planning and down time with all the chilling and freezing required.

1. Juice the watermelon. Strain. Straining is super important. If you don't get all of the pulp out, the texture will be a bit waxy. I learned that from my first attempt at sherbet.

2. Place sugar, salt, and lime juice in a food processor. Pulse til sand-like. Add watermelon juice and blend until sugar is dissolved.

you can add red food color but I prefer it natural
3. If you don't want pieces of mint in the sherbet, place a handful (or more) of mint leaves in the mixture and refrigerate for several hours.
Strain mint leaves out before adding to cream.

Otherwise you can just pulse the mint right in with the sugar.

I love mint. So I left the leaves in for a long time. If you aren't sure about mint, check back after 30 minutes or so and taste the mixture. Remember that the mix should be very sweet and overly minty at this point since freezing dulls flavors.

4. After mixture is well chilled and mint infused, whip heavy cream to soft peaks. Then, slowly pour in strained watermelon mixture with the mixer running.

5. Place in ice cream maker and churn about 30 minutes or until soft serve consistency is reached.

If you don't have an ice cream maker I think you could try making this sherbet with a blender. It would be more work. I imagine to get the consistency right you would need to take it out of the freezer every 30 minutes and blend. I can't guarantee this would work but if anyone gives it a try, let me know how it goes!

6. Pour in to a container and freeze for at least an hour (3 is better) before serving.

This recipe produces 10 servings at 120g or about 1/2 cup

Approximate Nutrition Per Serving: 204 calories, 8g fat, 31 carbs, 105mg sodium, 30g sugar.

Next time I make this I'll probably use less sugar-maybe 7 or 8 ounces. Watermelon is naturally sweet so I felt the additional sugar was overkill. This is probably the only sherbet I've ever eaten that has satisfied my sweet tooth after a single serving.

Now that I've broken the ice cream attachment in, I can't wait to try more recipes!

look at that silky texture!

Tuesday, April 22, 2014

I Might Be a Cake Person After All

gettin' a lil fancy y'all

Over the last two weeks we've been learning about cakes in my baking class.

We have done high ratio and lean cakes. We've made buttercream frosting, ganache, and glaze.

And, once again, I amazed by all of the technical detail that goes in to baking a great cake.

I knew cake decorating was an art but the actual baking of a perfect, moist cake with a tender and uniform crumb is no easy task.

And, don't even get me started on the technical skill needed to produce an amazing Italian Buttercream.


 For the first cake class I picked a basic yellow butter cake and a vanilla buttercream frosting.

I realized that while I've made a ton a fancy desserts, I've never actually made a "birthday cake." Since I was new to this type of cake I wanted to start with the basics.


not too bad for a first try


If you've never done it, let me just tell you that frosting a cake with an offset spatula is a b**** the first few times.

I had no problem putting the frosting on top but when it came time to do the sides I was dumbfounded.

I literally just stared at the cake for what felt like an eternity before the instructor came by to give me some tips.


whipped cream can hide a multitude of sins
Then we moved on to lean cakes. Think low or no fat but lots and lots of sugar. (ie Angel Food)

 I made an Orange Chiffon cake. It was supposed to have a glaze.

Let's just say that didn't work out.

So, I covered it in whipped cream.


ran out of time so I just sprinkled it with coffee...whatevs

 And, my second attempt at decorating with buttercream came with a Genoise cake. These cakes are super dry and are normally served brushed with syrup.

To me, it seems crazy to bake a dry cake on purpose and then soak it in flavored syrup to make it moist.


I did go in to the cake section of the class thinking I'd learn some valuable skills but I had the mindset that I would never focus on occasion cakes in my career.

this is what the end of class looks like
However, I might have changed my mind.

The technical skill of cake baking is nothing to brush off.

Cake decorating requires intense focus y'all.

A perfectly smooth buttercream takes lots of practice both to make and apply.

I really love how creative I can be when it comes to both the construction, flavors, and presentation.

While I think plated desserts will always be my focus I might I'm on my way to becoming a closet cake person!

After these two classes and in preparation for my cake exam I made two practice cakes.

The one below with a basic scroll border and the "rose" cake at the top because I find the scroll border extremely boring!

Both cakes are white velvet with chocolate pastry cream filling and a coffee Italian meringue buttercream.


the inside of the rose cake


Friday, April 11, 2014

Paradise Donuts Review


Charlie and I recently took a trip down to Manhattan (Kansas).

On the way, a road sign told us we were on the way to Oz.

Very cool Kansas.

Once in Manhattan, I immediately spied Paradise Donuts.

It seems like I have a radar for any sweet shop. Paradise Donuts is located in a strip mall behind a gas station. I saw the sign diagonally from across the street.

And, I had to go in and check it out. I'm very glad I did for several reasons.


Reason #1


They put maple glaze on a heavenly chocolate cake donut.

The glaze was more like a layer of fondant. It was not clear or thin. The cake was thick and moist. I'm also about 90% sure they bake them in a mold I've used for eclair creations.


A lone boy sprinkle was captured by the girl sprinkles! Oh my!
Reason #2

They fill donuts to order. Yes. TO ORDER!

You can choose a donut from a variety of long johns with different toppings. Then, you pick  your filling. When I visited they had three fillings available: vanilla fluff, Bavarian cream, blackberry.

I picked a lemon and sprinkle covered long john with the blackberry filling.


Reason #3

They have Four Square.

And, no minimums for credit card purchases. I spent a whopping $2.80 for two donuts and paying with my card was no problem.

Reason #4

The fill-able long johns aren't the only donuts in the case They had round yeast donuts with a variety of toppings as well as bear claws, cinnamon rolls, and twists etc.

They also serve biscuits and gravy.

There menu is two simple white boards behind the counter that they can change at will to update new/different case selections and prices.

We'll be together soon!
Reason #5

I met this baby.

I had no idea donut fillers like this existed! If I ever end up doing any type of filled pastry in large quantities I'll be purchasing one (or more) of these babies. Bye bye piping bag!

 If you are ever in Manhattan (Kansas) they are certainly worth a visit